
Want to create a free dropshipping website with WordPress?
We've got you!
We’ve put in the hours and done our research to show you exactly how to get your WordPress dropshipping site up and running without spending money.
Stick with us; by the end, you'll have a much better understanding of creating and running a WordPress dropshipping website.
Let's turn that vision into reality, shall we?
10 Steps to create a WordPress website for dropshipping
Here are the ten steps to create a free dropshipping website with WordPress:
- Install WordPress and add the WooCommerce plugin
- Choose a theme
- Find a free dropshipping supplier
- Add products
- Add plugins
- Customize your dropshipping store
- Set up shipping
- Set up taxes
- Set up your payment gateways
- Promote your store
1. Install WordPress and add the WooCommerce plugin
If you have done some research already, you will know that you need the WooCommerce plugin and a hosting service to create a dropshipping website on WordPress.
If this sounds new to you, click here to jump to a later section of this article where we explain it.
Now, let's start the process of setting up WordPress and WooCommerce:
Option 1: Direct installation via the hosting provider
Installing WordPress and WooCommerce directly with your host is the hands-down simplest path.
Take SiteGround, for example.
Just select ‘WooCommerce, ' and it will set up both WordPress and WooCommerce:
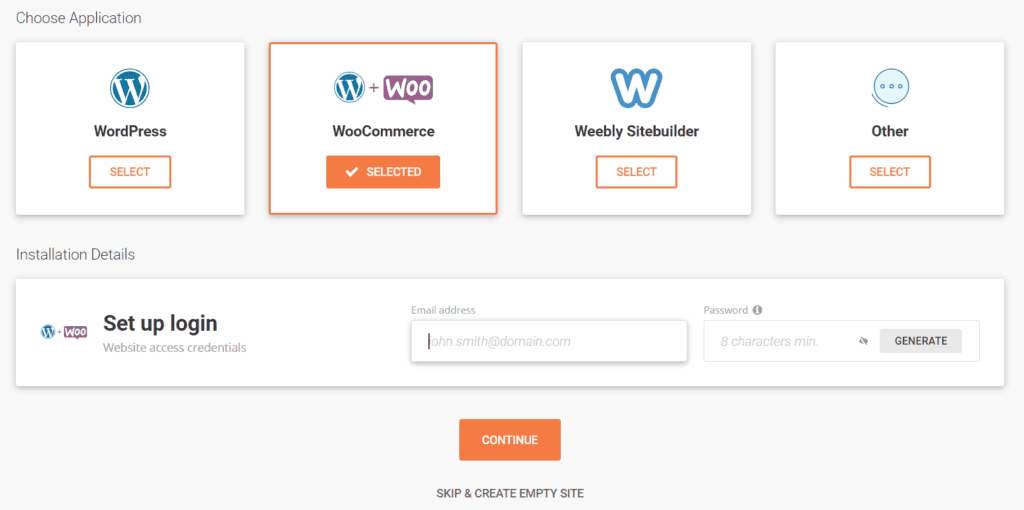
This one-click feature is a real time-saver.
And if you hit a bump? Most hosts have a support team ready to help. Don't hesitate to reach out to them!
Note: This step will look different if you pick a host other than SiteGround. However, if you pick any major hosting company, the process will be very similar to this.
Option 2: DIY install
If you prefer a more hands-on approach or your host doesn't offer direct installation, you'll be setting up WooCommerce manually.
Keep in mind that you do need to have a WordPress website already to install WooCommerce.

Here’s what to do:
- Navigate to 'Plugins' within WordPress using the left-side menu.
- Search for 'WooCommerce'.
- Hit 'Install Now,' then 'Activate.'
Upon activation, a setup wizard will walk you through the following details:
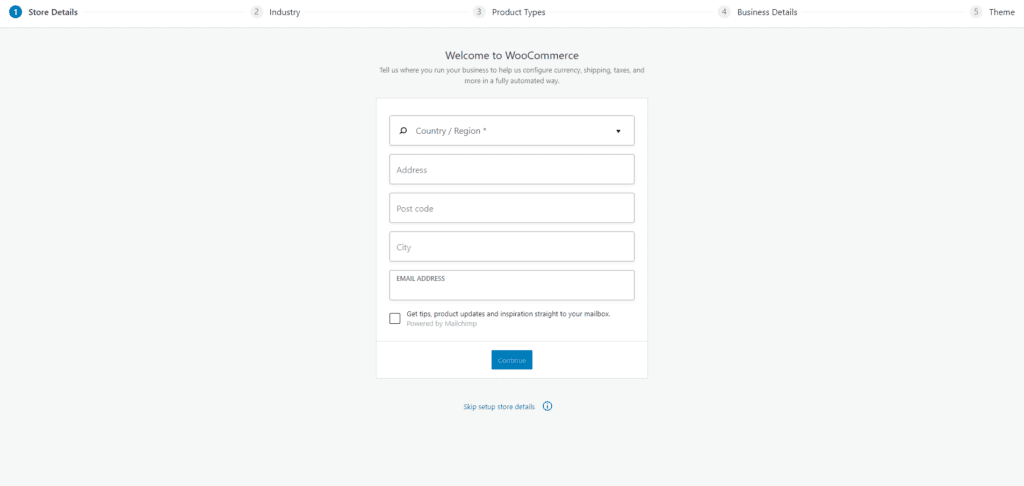
- Store Details. Add your store's address.
- Industry. Select the appropriate industry from the provided options.
- Product Types. Select 'Physical products' from the list. You can also select a customizable product if you want to provide customization options.
- Business Details. Indicate how many products you'll offer and if you sell elsewhere. If you're just starting out, you can choose 'I don't have any products yet.'
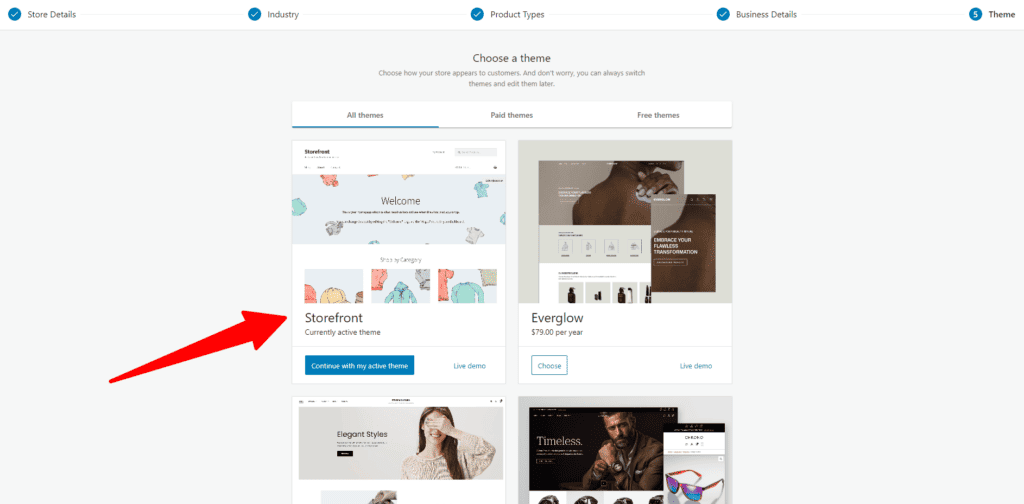
- Theme. The default version, the Storefront theme, is free. Simply click 'Continue with my active theme.'
We'll talk about themes in more detail below.
2. Choose a theme
Your theme is the look of your website.
It's simple to change your site's look without a complete overhaul. Just swap out the old theme for a new one, and you have a brand-new design!
There are two ways to add a theme to your store:
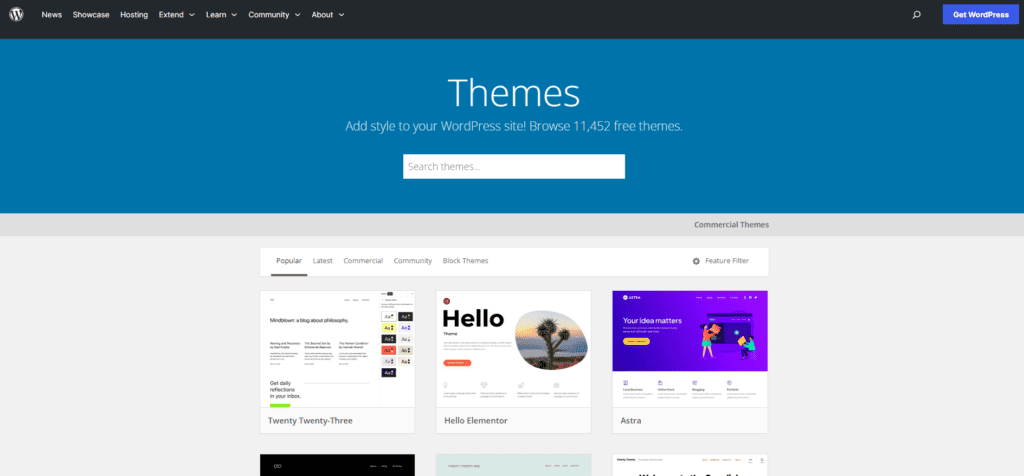
- Select a free (or premium) theme from WooCommerce.
- Upload a third-party or custom theme.
WooCommerce offers three themes:
- Storefront. Versatile, works for most stores.
- Deli. Earth-toned, great for natural or handcrafted goods.
- Boutique. Ideal for small shops and boutiques.
You can choose the Storefront theme as it’s very intuitive and suits most dropshipping stores.
Alternatively, choose a free third-party WooCommerce theme like OceanWP. Mind you, you'll most likely need to upgrade to a paid plan to customize it to your liking.
To install a third-party theme, follow these steps:
- Download the theme's .zip file.
- On your WordPress dashboard, navigate to Appearance > Themes and click 'Add New.’
- Click 'Upload' to add the .zip file.
- Click ‘Activate.’
3. Find a free dropshipping supplier
Next, you need to find a dropshipping supplier for your products.
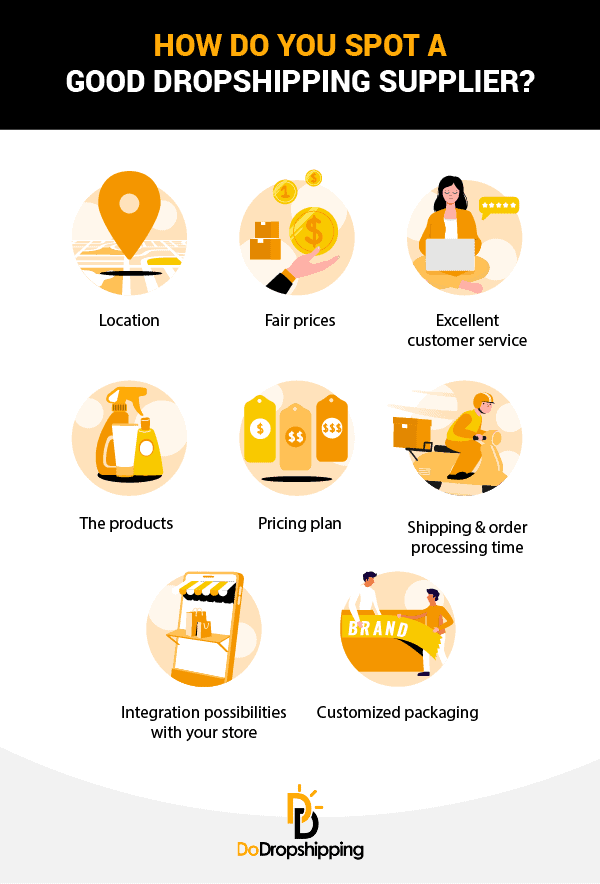
Before you start, learn how to identify a reliable supplier.
Here's an infographic to help you spot one:
Now, let’s look at some of the best free dropshipping suppliers out there!
We've made an overview of them in the table below.
Click ‘Read Review’ to open a new tab with our detailed supplier assessment, including their strengths and weaknesses.
| Supplier | Pricing | Read Review |
| Syncee | 0 to $99 per month | Syncee Review |
| Spocket | $40 to $299 per month | Spocket Review |
| AppScenic | $29 to $89 per month | AppScenic Review |
| AliExpress | Free | AliExpress Review |
| CJdropshipping | Free | CJdropshipping Review |
| Alibaba | Free | Alibaba Review |
| HyperSKU | Free | HyperSKU Review |
| Zendrop | Free | Zendrop Review |
| Avasam | £19.99 to £149.99 | Avasam Review |
Note: Some suppliers offer free plans with product limits, like AppScenic's 100-product cap.
These dropshipping platforms easily integrate with your WooCommerce dropshipping store, letting you browse and import products with a click of a button.
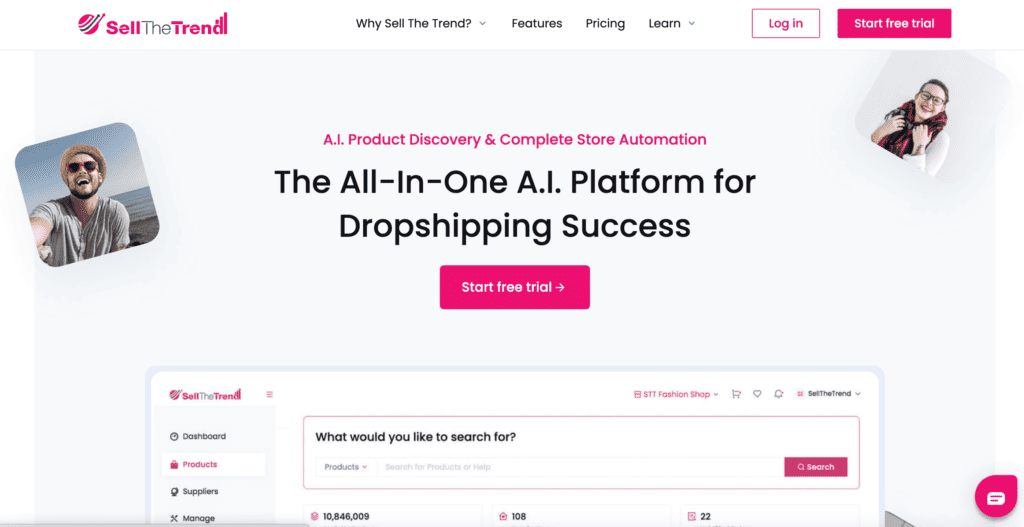
Dropshipping platforms like Sell The Trend and Spocket offer additional tools that help you find trending and winning products:
Alternatively, you can find a local supplier through a simple Google search.
In our experience, they often provide fast delivery times, which is essential for dropshipping stores.
Choosing a local supplier can also save you from the 'software fees' often charged by platforms like Spocket or Syncee on their higher plans.
However, most local suppliers don't offer direct integration with WordPress websites. So, you might have to add products and process orders manually.
Note: Make sure you order samples before settling on a supplier to ensure product quality.
4. Add products

After choosing a supplier, it’s time to add products!
In our experience, it’s best to enter the essential details about your products now so you can see how your store is shaping up before you dive into customizing it.
If you’re using a dropshipping platform like HyperSKU or Syncee, you can simply add a product from their catalog with a single click.
Working with a local supplier? You'll likely be adding products yourself.
If you know your way around WordPress, you can bulk upload your product details using a CSV file directly into the platform.
For those who'll be adding products one by one, read this detailed WooCommerce guide on adding and managing products.
Tip: Looking for an all-in-one article about everything you should know about dropshipping? If so, check out our dropshipping guide!
5. Add plugins
WordPress gets even better when you add plugins. You can add features like pop-ups, size guides, and memberships using plugins.
The best part is that almost all the 55,000+ plugins on WordPress are free or have a freemium pricing model.
To get started, check out these essential (and free) WooCommerce plugins for your dropshipping website:
- WooCommerce Google Analytics
- Menu Cart for WooCommerce By WP Overnight
- Wordfence Security
- Variation Swatches for WooCommerce By Emran Ahmed
- Booster for WooCommerce by Pluggabl LLC
- Rank Math
- Forminator
Once you get your dropshipping site up and running, you'll want to add more features.
You can then do your own research and install plugins by navigating to Plugins > Add new through the WordPress dashboard.
But you should know that the more plugins you add, the slower your website can get.
Plus, always install plugins from reliable companies, or else there is a possibility of getting hacked or locked out of your own dropshipping store.
6. Customize your dropshipping store

To customize your dropshipping store, you need to:
- Design your logo
- Add content
- Style your store
Let’s start with your dropshipping logo!
Your store's logo is as crucial as your store name — it sticks with your visitors.
For tips on designing a logo that stands out, take a look at this guide:
How to Get a Logo for Your Dropshipping Store? (5 Options)
Next, let’s add content to your dropshipping website by creating the standard pages that any ecommerce store needs. Think about your FAQs, Return Policy, and Shipping Policy pages.
When designing your store, drawing inspiration from leading names in the industry can be incredibly helpful.
Check out examples from the best to spark your creativity:
- 19 WooCommerce Online Store Examples in 2024 | Inspiration
- 10 Great Ecommerce Brand Store Examples 2024 | Inspiration
- 9 Checkout Examples From Ecommerce Stores | Inspiration
- 9 Ecommerce Landing Page Examples in 2024 (+ 9 Tips)
- 10 Product Page Examples From Ecommerce Stores | Inspiration
Finally, let’s truly customize your store by styling it!
From the WooCommerce dashboard, go to Appearance > Customize. This ‘Customizer’ shows a live preview of your store as you make changes.
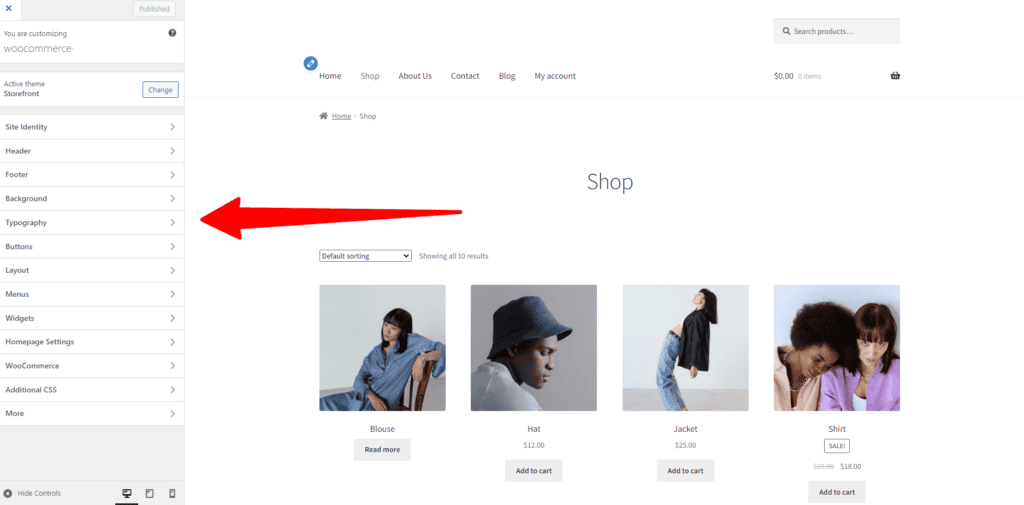
Here's what you can personalize:
- Site identity
- Header
- Footer
- Typography
- Buttons
- Product catalog
- Product page
- Checkout
You can read more about how to manage layout, store notice, and more by reading this detailed article here.
7. Set up shipping
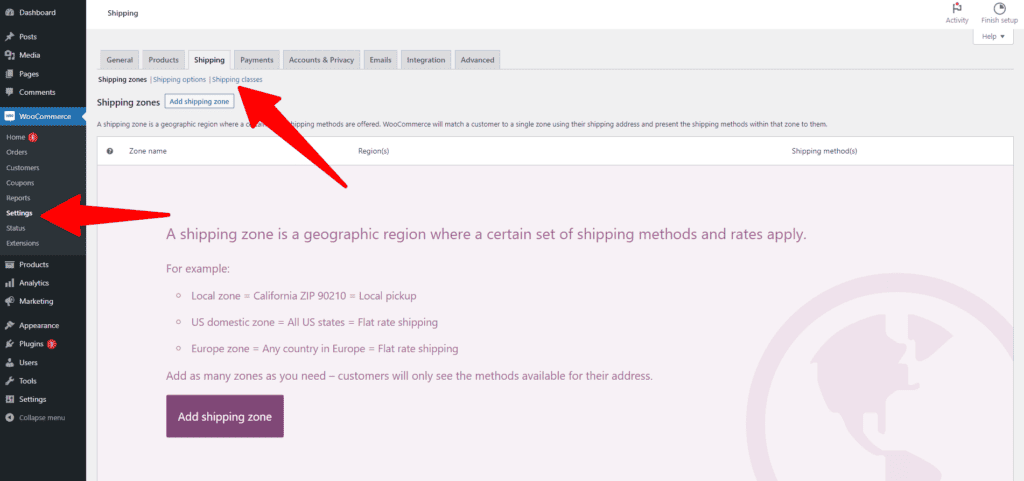
Setting up shipping in WooCommerce can get a bit complicated, especially if you’re new to dropshipping.
But don’t worry; we’ll simplify the process for you!
First, you need to set up shipping zones.
These are the regions where you ship goods. For example, a 'Domestic' zone can cover all US states, or an 'East Zone' for just the eastern ones.
Next, you’ll need to add shipping methods to the zones. WooCommerce supports three primary shipping methods:
- Flat rate
- Free shipping
- Local delivery
You can assign different methods to different zones depending on your needs.
And finally, you need to apply rates to your shipping methods.
Say your supplier charges a $10 shipping fee for any US state; you could set a flat rate of $10 or more for all zones.
To access these settings, go to WooCommerce > Settings > Shipping in your dashboard.
For a more detailed walkthrough, take a look at this free guide.
8. Set up taxes
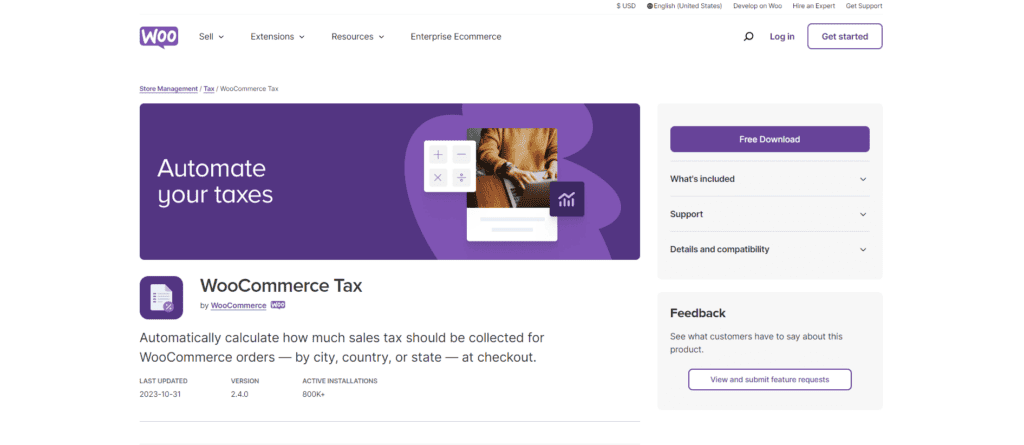
Setting up taxes is straightforward with WooCommerce, especially if your customers are in the US, Australia, Canada, the UK, or Europe.
Just use the WooCommerce Tax plugin, which is free and automates sales tax calculations at checkout based on the customer's location.
If you’re in any other country, you can check out your country-specific tax plugins in the WordPress Plugins store.
Alternatively, go to WooCommerce settings from the WordPress dashboard, select the ‘General’ tab, and scroll down to check the ‘Enable tax rates and calculations’ box.
Save your changes, and you'll see a new ‘Tax’ tab next to the ‘Shipping’ tab where you can configure taxes manually.
9. Set up your payment gateways
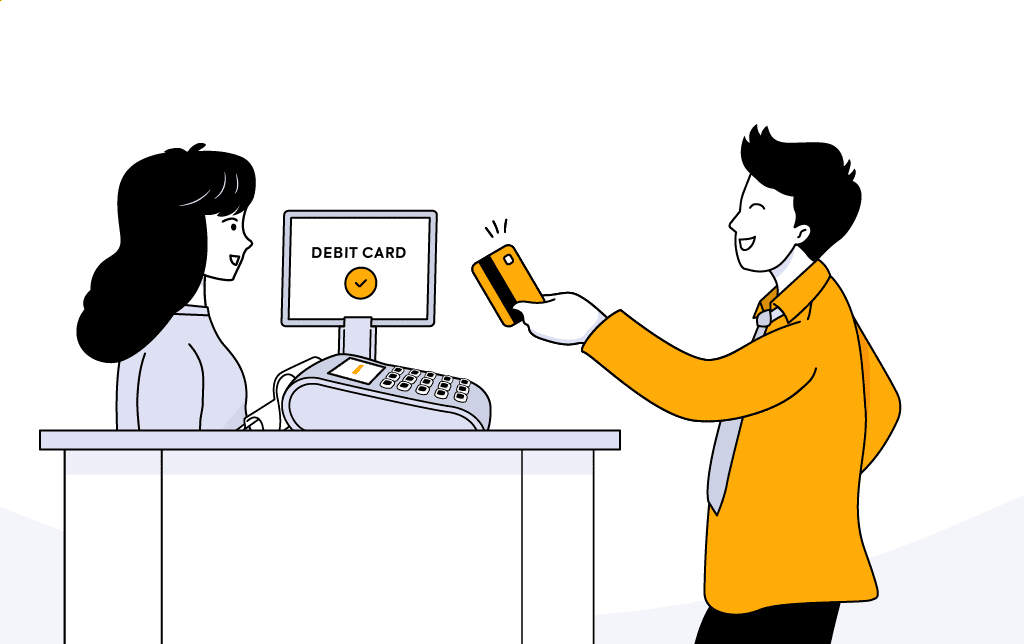
There are multiple payment gateways out there that you could use to accept payments from your customers.
When choosing one, it's important to consider the following:
- What are the transaction fees?
- Does it work with the country and currency of your target audience?
- How is their customer service?
Don't forget that you can and should offer multiple payment gateways to accommodate customer preferences.
For a roundup of the best payment gateways, take a look at the following table
| Payment gateway | Price rating | Read Review |
| WooPayments | Average | - |
| PayPal | Expensive | PayPal Review |
| Stripe | Average | Stripe Review |
| Amazon Pay | Expensive | Amazon Pay Review |
| Google Pay | Cheap | Google Pay Review |
| Apple Pay | Cheap | Apple Pay Review |
Here's a strategy to help you select a payment gateway:
- Identify the countries you'll sell to and their preferred payment methods. For instance, Klarna is popular in Germany.
- Integrate popular payment gateways like Stripe or PayPal.
- If you face challenges with major gateways, try smaller ones as a test.
Keep in mind that payment gateways charge a fee per transaction, which only applies when you make a sale. Factor this into your pricing structure to maintain your profit margins.
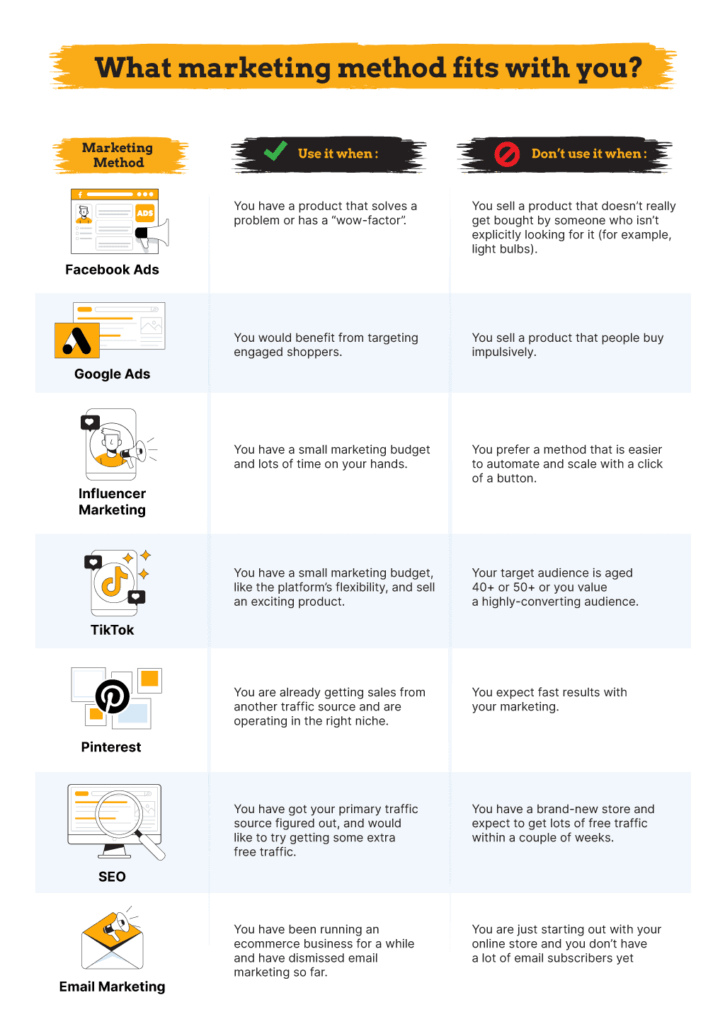
10. Promote your store

Marketing your dropshipping store doesn't have to break the bank; there are several strategies to get your name out there.
Fortunately, there are free strategies you can use to attract visitors to your dropshipping store. Just be ready for it to take some consistent effort and time.
Here is a list of some free marketing methods you can try:
- Search engine optimization (SEO). Optimize your dropshipping store for search engines and start a blog to attract organic traffic.
- Instagram. Use relevant hashtags to reach a wider audience and collaborate with influencers.
- Facebook. Grow an organic following on Facebook, engage in Facebook Groups, or sell on the Facebook Marketplace.
- Pinterest. Create pins that showcase your products and drive traffic to your store.
- TikTok. Drive traffic to your dropshipping website using influencers and organic content.
If you decide to invest in marketing later, this infographic can help you determine the best marketing methods for your dropshipping store.
Things to know before creating a WordPress dropshipping site
Before you start building a free dropshipping website with WordPress, here are some important points to keep in mind:
1. WordPress versions
People often confuse WordPress.com with WordPress.org, but these are two distinct platforms.
WordPress.com offers a fully hosted service, like Shopify:
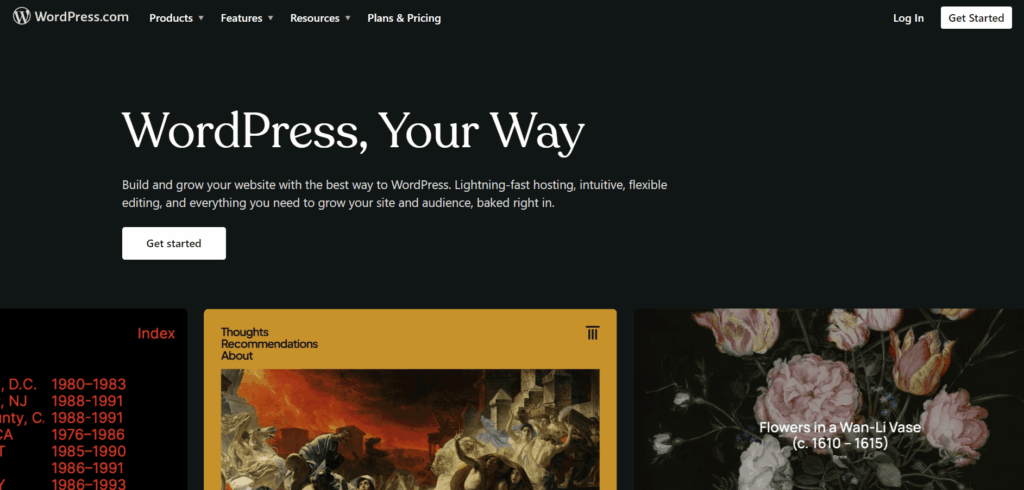
This means that your website resides on the WordPress.com servers, and you don't have to worry about finding a host or performing regular site maintenance.
While this can be convenient, it often comes with limitations on customization and monetization, which might not be suitable for a dropshipping business aiming for scalability and control.
WordPress.org, on the other hand, is what many consider the 'real WordPress.'
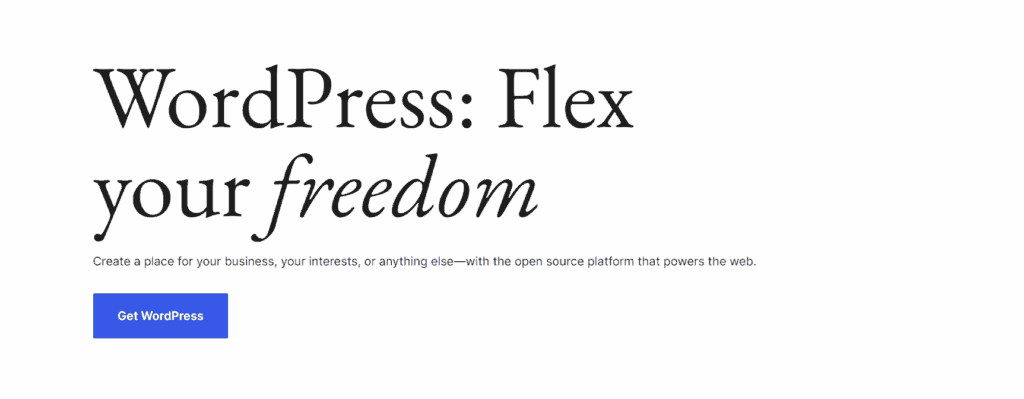
It’s an open-source software that’s free to download and install on your own hosting account.
This version gives you full control over your website and allows you to take advantage of the extensive plugin ecosystem that WordPress is known for.
We’ll focus on WordPress.org in the guide below, as it’s free and feature-rich for your dropshipping needs.
2. WooCommerce plugin
WooCommerce is a powerful WordPress plugin that transforms your website into a fully functional ecommerce platform.
And the best part is that it’s also free!
It is essential for creating a dropshipping website as it provides the framework for product listing, cart functionality, checkout processes, and payment options.
This guide will cover how to install WooCommerce, so stay tuned.

While WordPress is free, running a website isn't without costs.
Your site needs a domain name (your online address, like www.yourshop.com), which you'll buy from a domain registrar.
Many domain registrar companies like BlueHost offer a free domain name for the first year and then charge a higher fee from the second year onwards.
You can use them if you’re absolutely short on cash.
However, we recommend using NameCheap as they don’t offer any gimmicky rates. You’ll probably pay $8 to $12 per year with NameCheap.
Tip: For a deep dive into picking the perfect domain for your dropshipping store, check out our free guide.
In addition to the domain, you’ll need hosting.
Think of hosting as renting a spot on the internet for your site.
Hosting prices vary depending on the provider and the level of service you choose.
Hosting providers like SiteGround and Cloudways offer WooCommerce-focused plans starting at $2.99 a month.
4. Setting up your dropshipping business

Before creating a free dropshipping website with WordPress, you should get your dropshipping business plan in order.
First, decide on the store type: general, niche, or one-product. Check out our free guide here that can help you pick based on your experience level.
Then, identify the right products to dropship.
An ideal dropshipping product has the following characteristics:
- A wow-factor
- Problem-solving ability
- Good profit margins
- Difficult to find locally
- High quality
Here are some articles for you to get started:
- How to Find Winning Dropshipping Products (13 Research Methods)
- 18 Winning Dropshipping Product Examples
- The 17 Best Winning Dropshipping Product Research Tools
Lastly, define your target audience — the group you’ll aim your marketing efforts at.
For a detailed step-by-step guide on defining your dropshipping target audience, check out this article!
3 Practical tips for your WordPress dropshipping website
Now that you know how to create a free dropshipping website with WordPress, here are some amazing tips that will help you take your store to the next level.
1. Start for free, pay for progress

You can start a WordPress dropshipping store with little to no budget.
However, it’s not realistic to operate without some investment, especially when you’re just learning the ropes.
Sure, dropshipping is still cheaper than a brick-and-mortar store or selling your own goods online.
But you’ll need to invest in software, website design, paid plugins, and so on as your store expands.
For a deeper dive into what it takes financially to run a dropshipping store, take a look at this comprehensive guide:
Complete Guide: Can You Start Dropshipping Without Money?
2. Don’t install too many plugins

We've already cautioned against using too many plugins. But we want to reiterate that you truly understand this point.
Do you know how too many apps can make your phone sluggish?
It's the same deal with plugins on your site. If there are too many, your speedy site starts suffering.
Plus, plugins need updates, kind of like your phone's apps. When there are many, it's a juggling act to make sure they're all compatible.
Last but not least, plugins can have vulnerabilities. The more plugins you have, the higher the risk of security issues.
To maintain a healthy WordPress site for your dropshipping business, install only those plugins that are absolutely necessary for your operation.
3. Backup your store data

Just like a physical shop can face unexpected events like storms or power outages, your online store needs protection from its own digital disasters like hacking, faulty updates, or accidental data losses.
To safeguard your WooCommerce store, read this free guide on how to back up and restore data for your WooCommerce store.
Summary
Before we go, we've created a quick summary of this article for you, so you can easily remember it:
- To create a free dropshipping website, use WordPress.org and not WordPress.com.
- You'll need to install the free WooCommerce plugin to add ecommerce functionality to WordPress.
- There might be some unavoidable costs, like buying a domain name and hosting.
- You must take care of the dropshipping side of the business before setting up a website so that you don't waste your monthly website hosting.
- There are ten key steps to creating a WordPress dropshipping website. Read our above guide and the articles we linked to know more.
- Remember, you must invest in your dropshipping store sooner or later, so be prepared for that.
Final thoughts
That's a wrap! You've got the essentials to launch a free dropshipping site with WordPress in 2024.
Remember, there's no shortcut to success. Stay persistent, and don't buy into the 'quick cash' myth.
Our blog doesn’t endorse paid dropshipping courses; they're why we started this resource in the first place.
Curious about our take on why these courses are a waste of money? Check out our thoughts here.
Good luck with setting up your WooCommerce dropshipping store!
Want to learn more about WooCommerce?
Ready to move your dropshipping store to the next level? Check out the articles below:
- 10 Best WooCommerce Dropshipping Themes in 2024
- 14 Best WooCommerce Dropshipping Plugins in 2024
- Shopify vs. WooCommerce: Which One for Dropshipping in 2024?
Plus, don't forget to check out our in-depth how to start a WooCommerce store guide here.


")


